

Tutorial series Published 2025
AI Agents in Python
A three-part progression from simple decision agents to LLM-powered agents and clarifying loops that ask before acting.
Software, trading infrastructure, AI experiments, and unusual research.
Built and documented here.
Four pillars
The blog still matters, but the structure now starts with the main threads underneath it: projects, technology, trading, and time.
Work
Libraries, tools, browser extensions, trading infrastructure, and experiments that turned into real systems.
From goeph and backtesting tools to older frameworks like Nirman and Livebase.
ExploreCode
AI agents, Go systems, JavaScript, architecture, debugging, and the practical side of building software.
Current writing leans heavily into AI workflows, software design, and developer tooling.
ExploreMarkets
Backtesting, strategy evaluation, trading psychology, and the systems thinking needed to survive real markets.
A mix of code-first research, practical trading process, and uncomfortable lessons.
ExploreResearch
Time cycles, ephemeris-driven research, celestial data, and the thread tying outcomes, astronomy, and pattern-seeking together.
Where celestial data meets quantitative methods and pattern research.
ExploreSelected work
A three-part progression from simple decision agents to LLM-powered agents and clarifying loops that ask before acting.
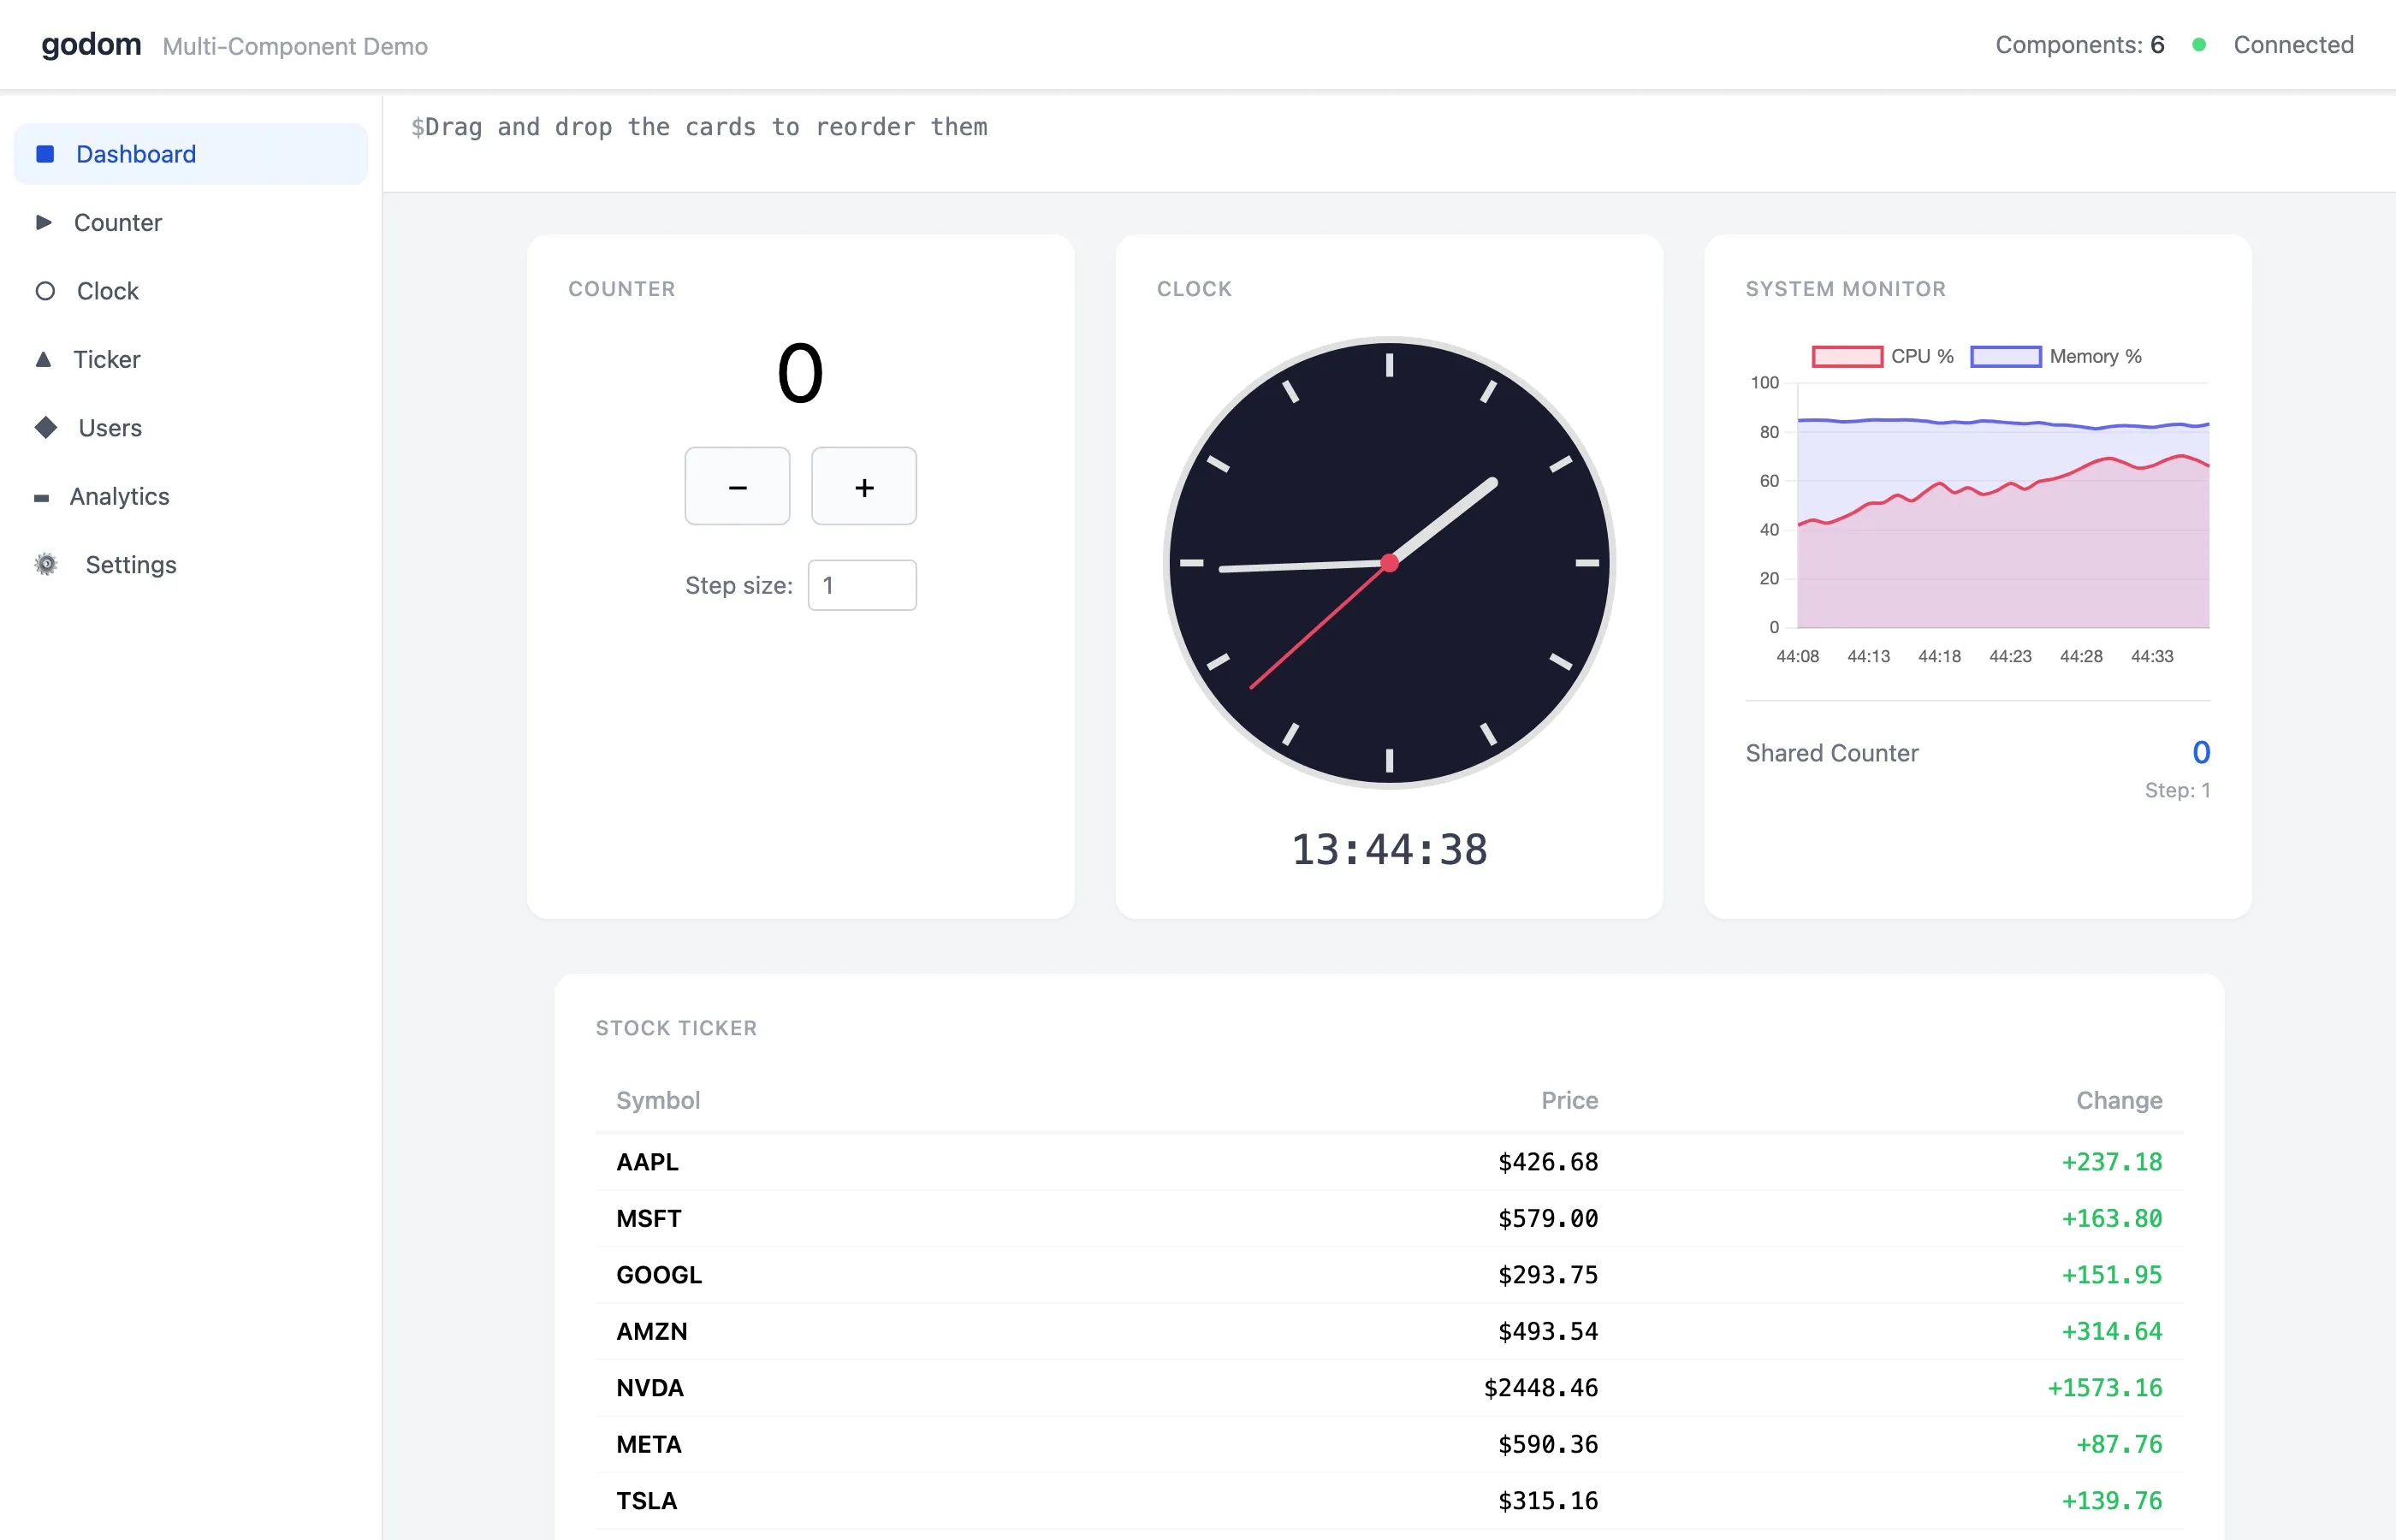
A Go framework for local apps where the Go process owns the DOM and the browser is just a screen. No Electron, no complex JS frontend, no API layer; go build gives you one binary that opens a tab.

A custom backtesting engine built for strategies that stopped fitting neatly inside off-the-shelf Python frameworks.

A Go ephemeris toolkit built on NASA JPL ephemeris data, born from porting a real Skyfield-based workflow. Now the bedrock for further tooling in this space.

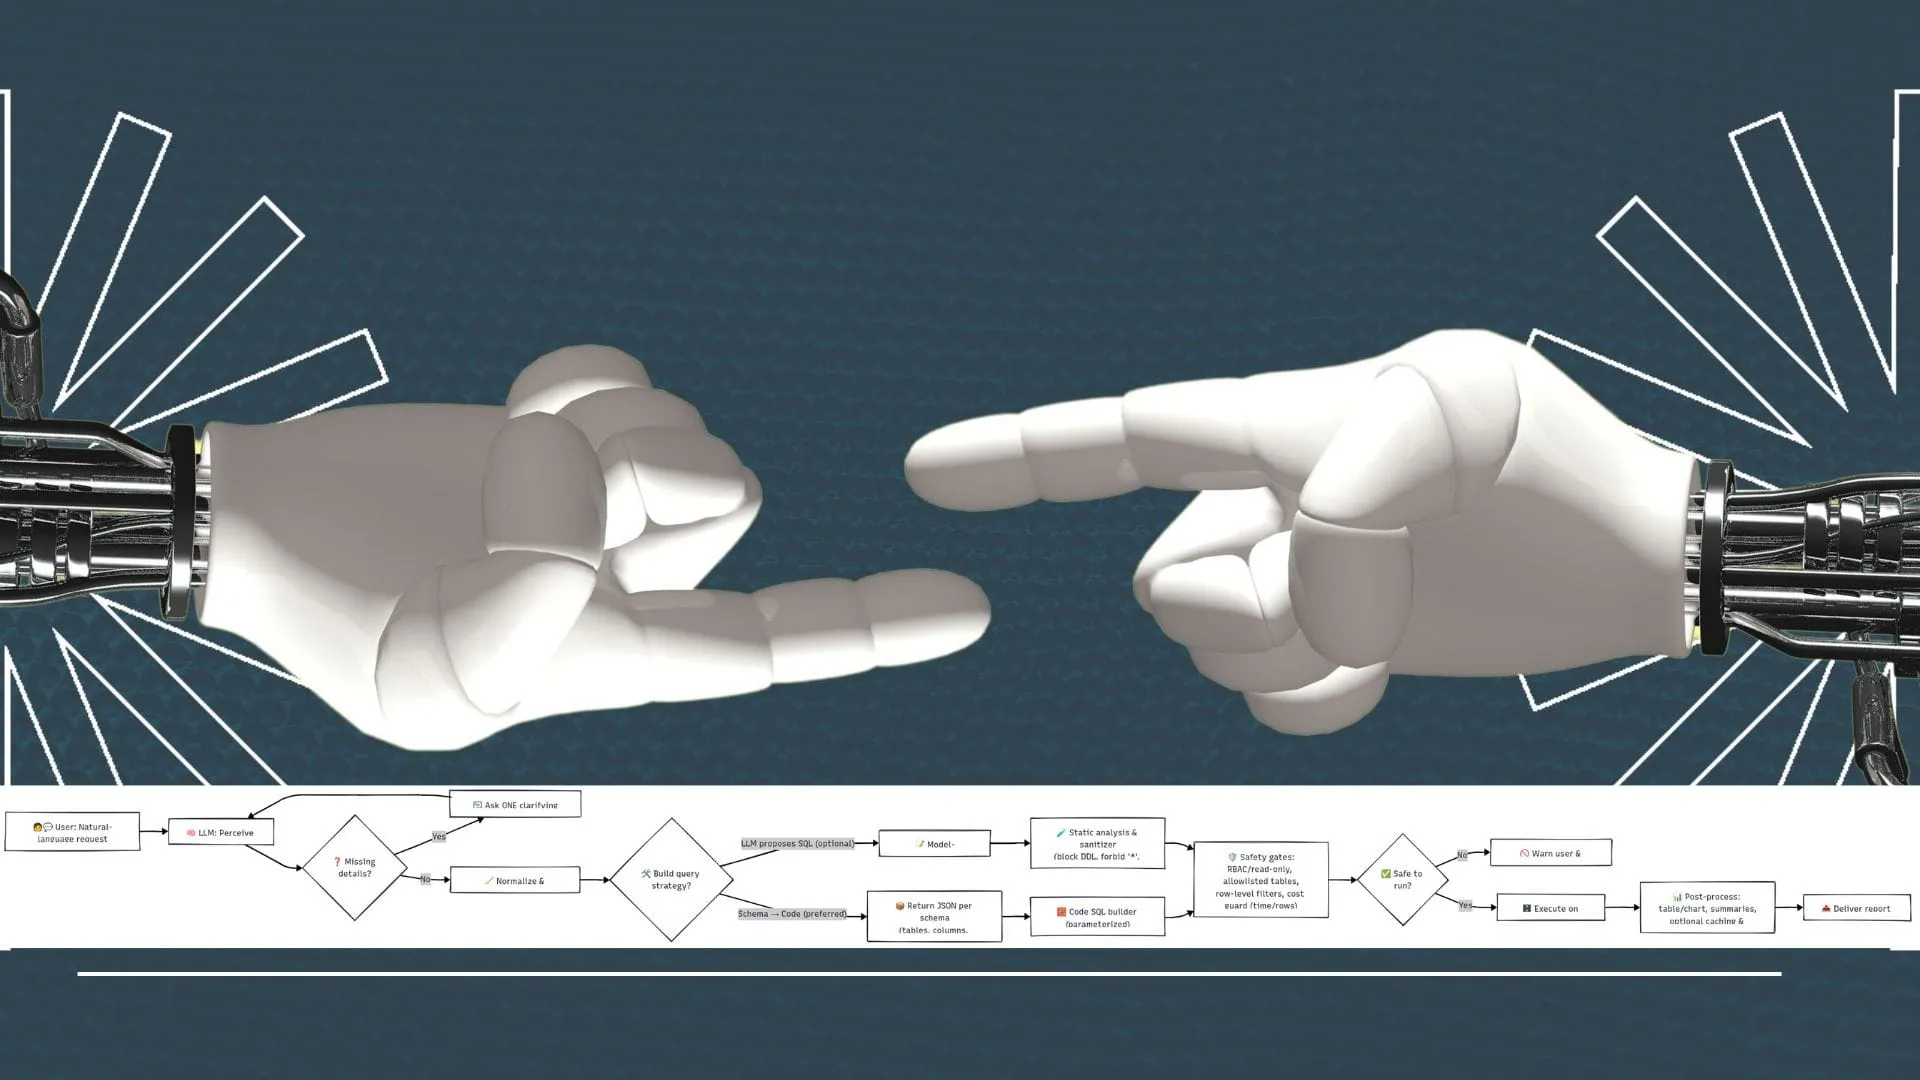
A sitemap-driven SEO analysis workflow built almost entirely with AI agents, then corrected by hand where the agents drifted.
Recent writing
May 30, 2026
Gartley, Bat, Butterfly, Crab on ES from 2020 to 2024. One looked tradeable; the cross-instrument check killed the universal claim.
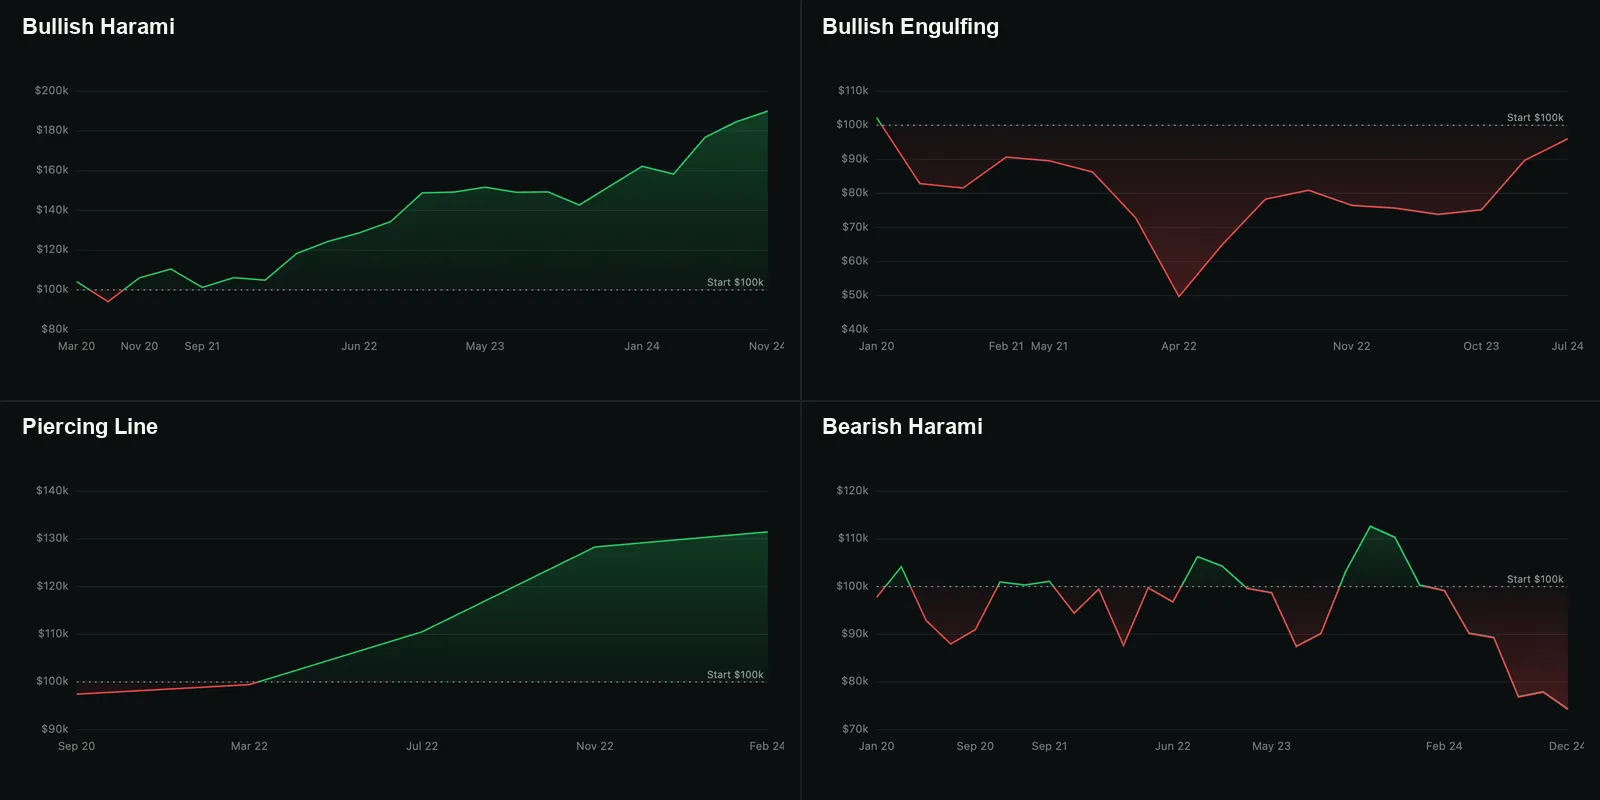
May 29, 2026
Six candlestick patterns tested on NQ from 2020 to 2024. One held up. Two failed cleanly. One fired too rarely. Two were NQ-only artifacts.
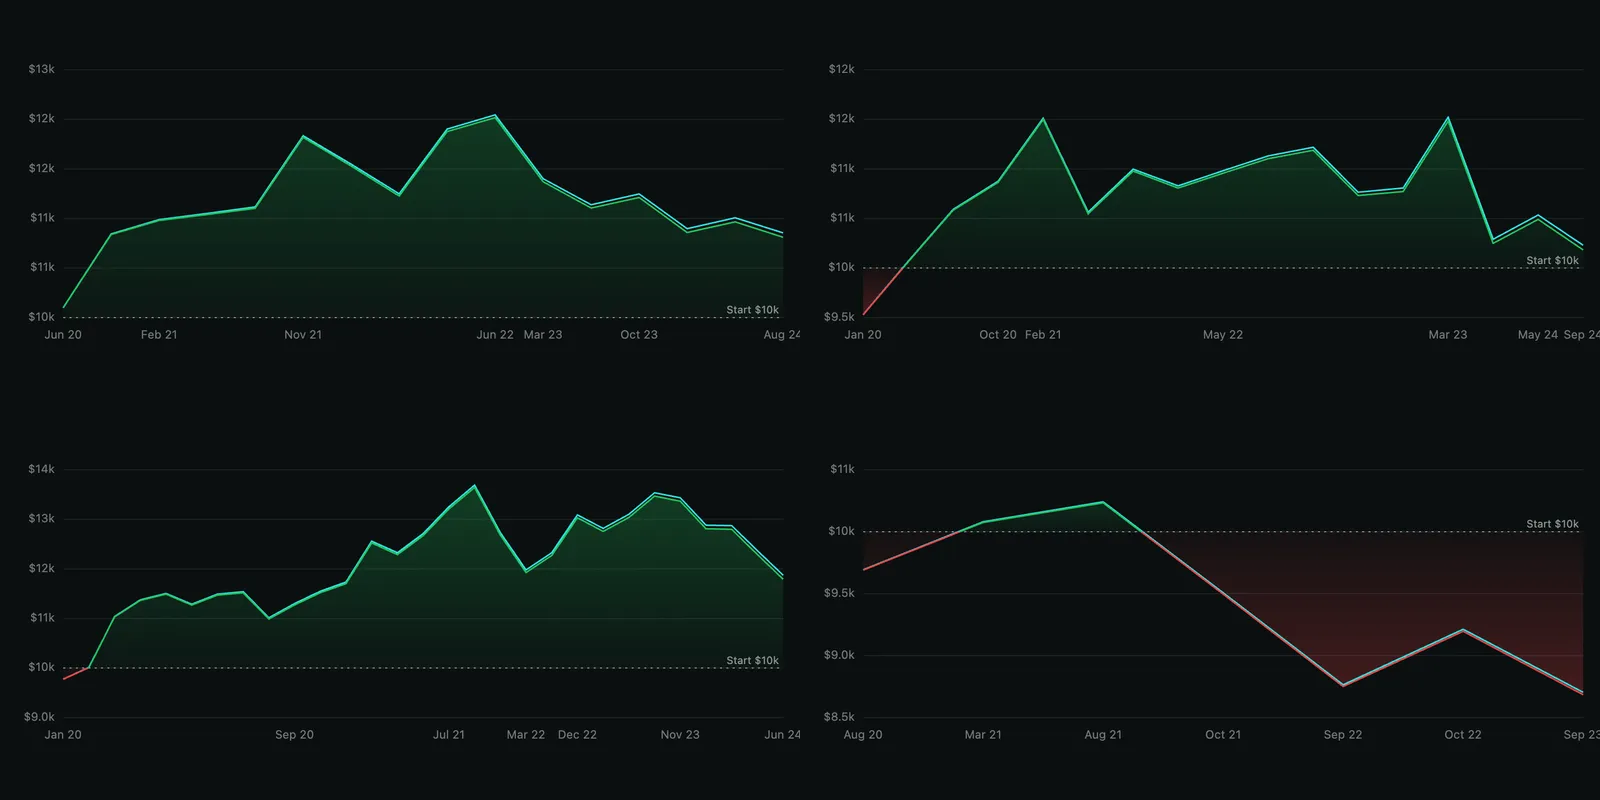
May 26, 2026
I tested moving-average crossover on NQ 1H, ES 1H, GC 1H, and the daily 50/200 golden cross. Three of four told a different story.
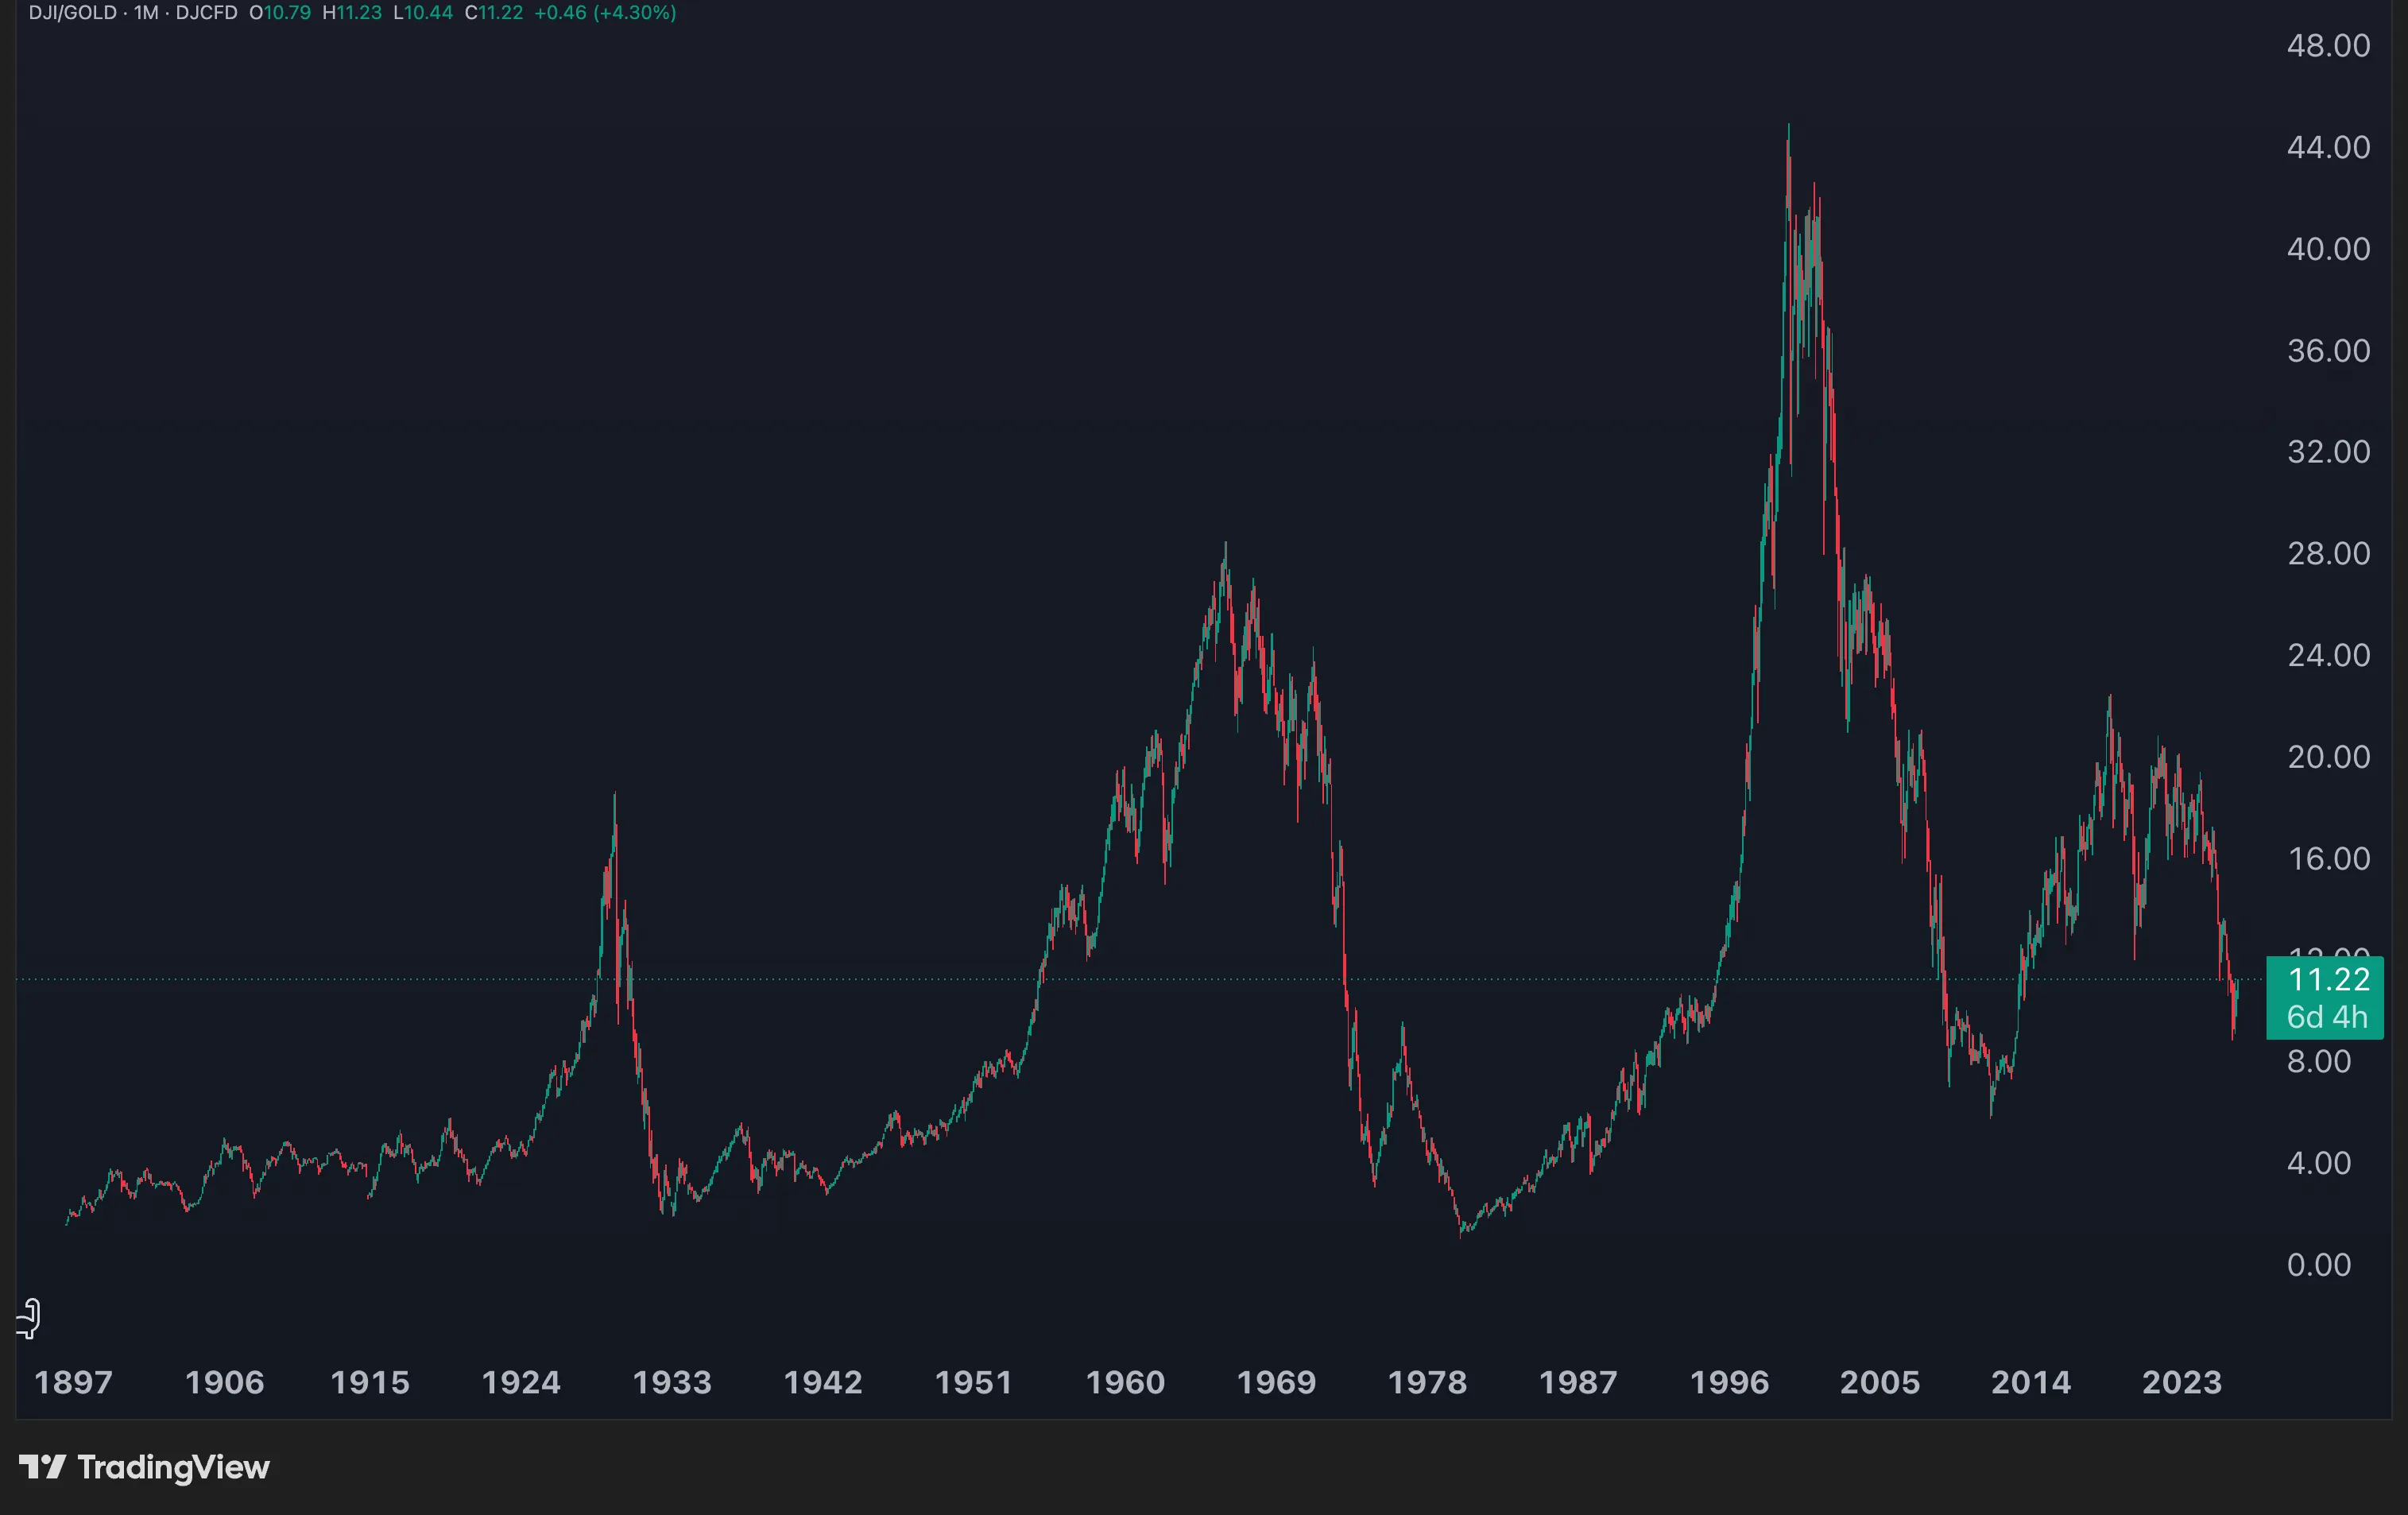
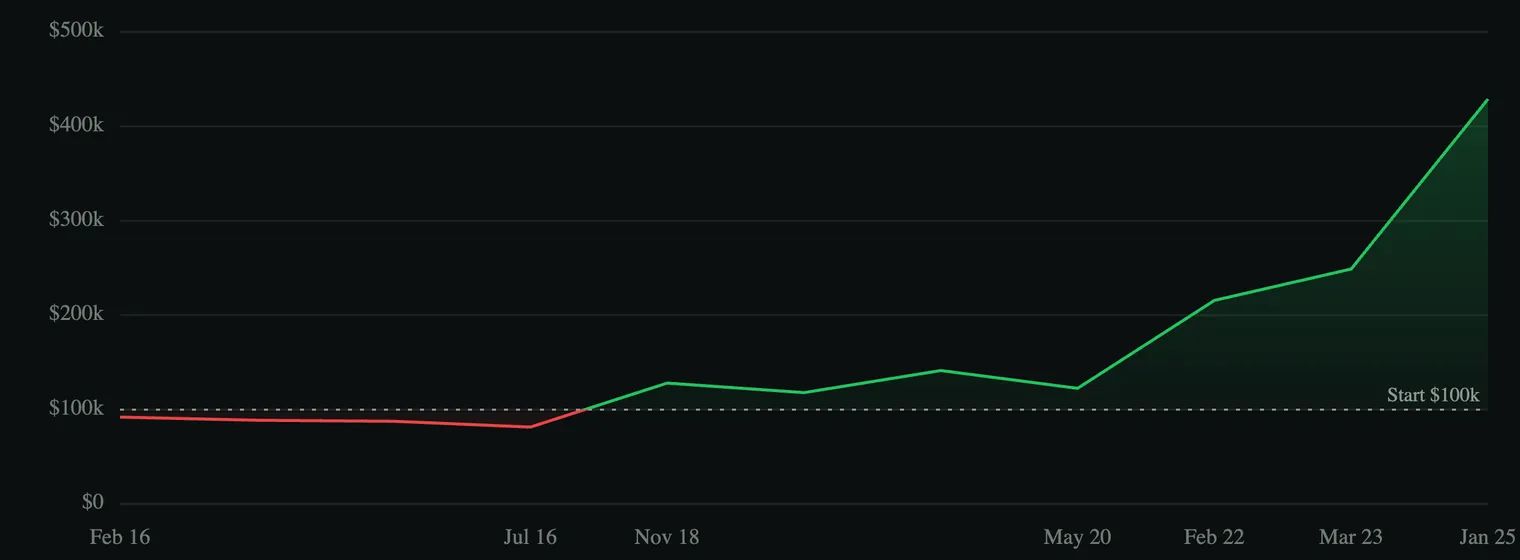
May 23, 2026
In dollars the S&P 500 has made huge new highs since 2000. In gold, it never got back to its peak. What changes when you swap the measuring stick?
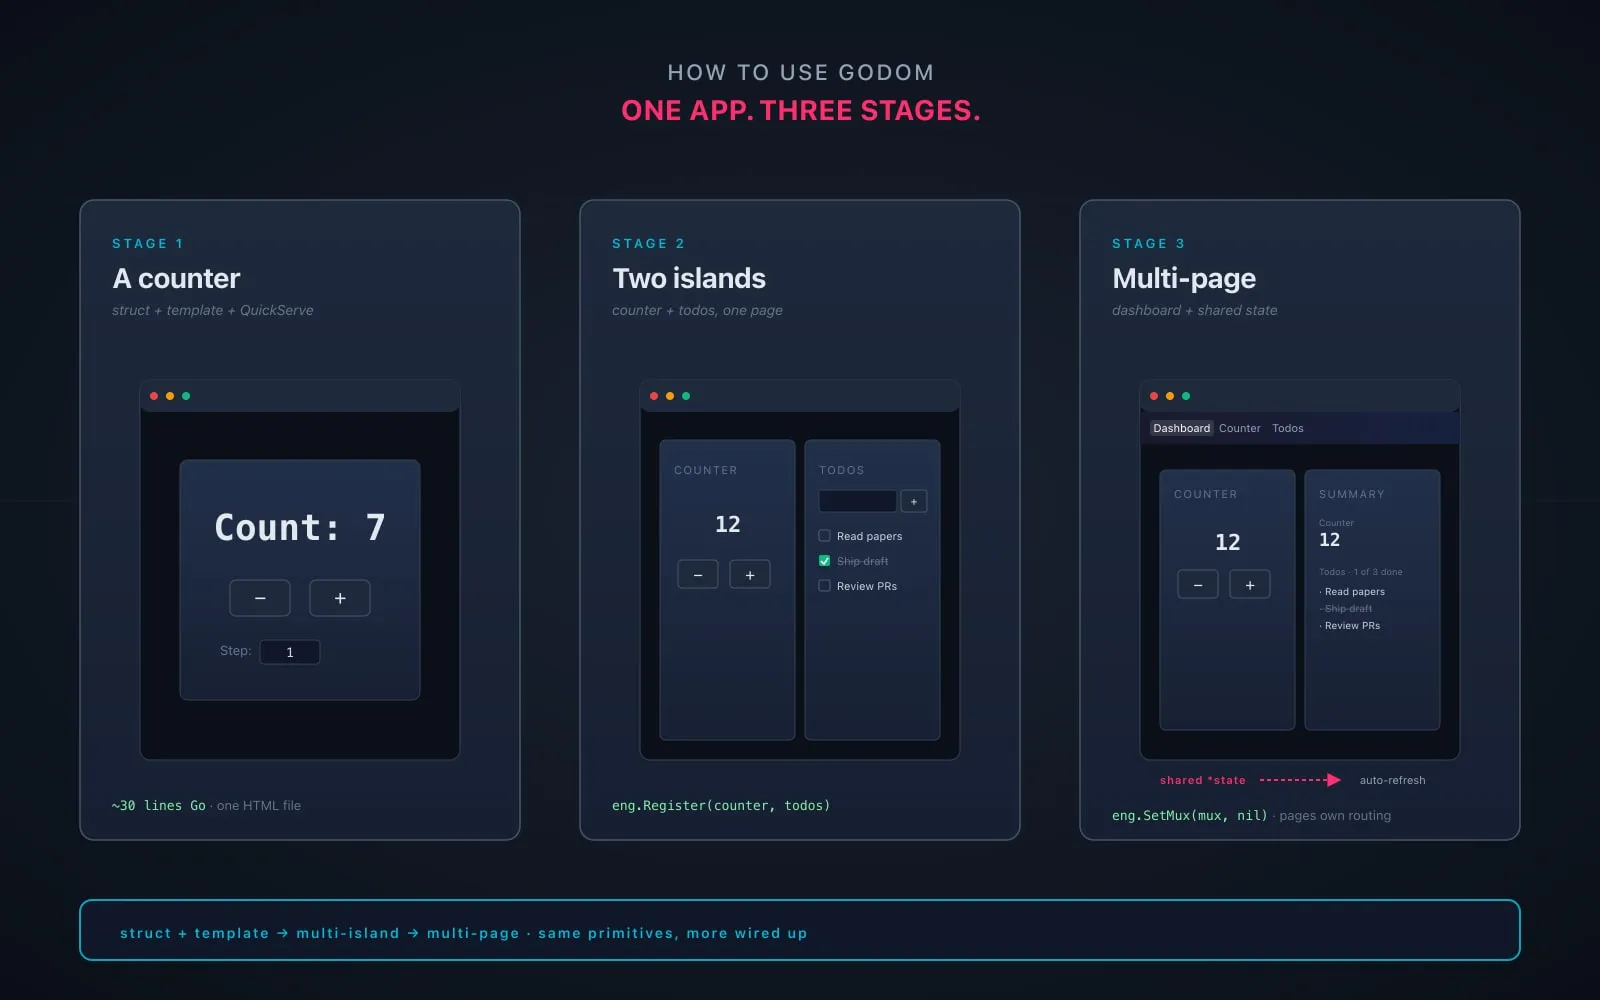
May 11, 2026
Building a small godom app in three stages: a counter, two islands on one page, then a multi-page layout with a shared-state dashboard.
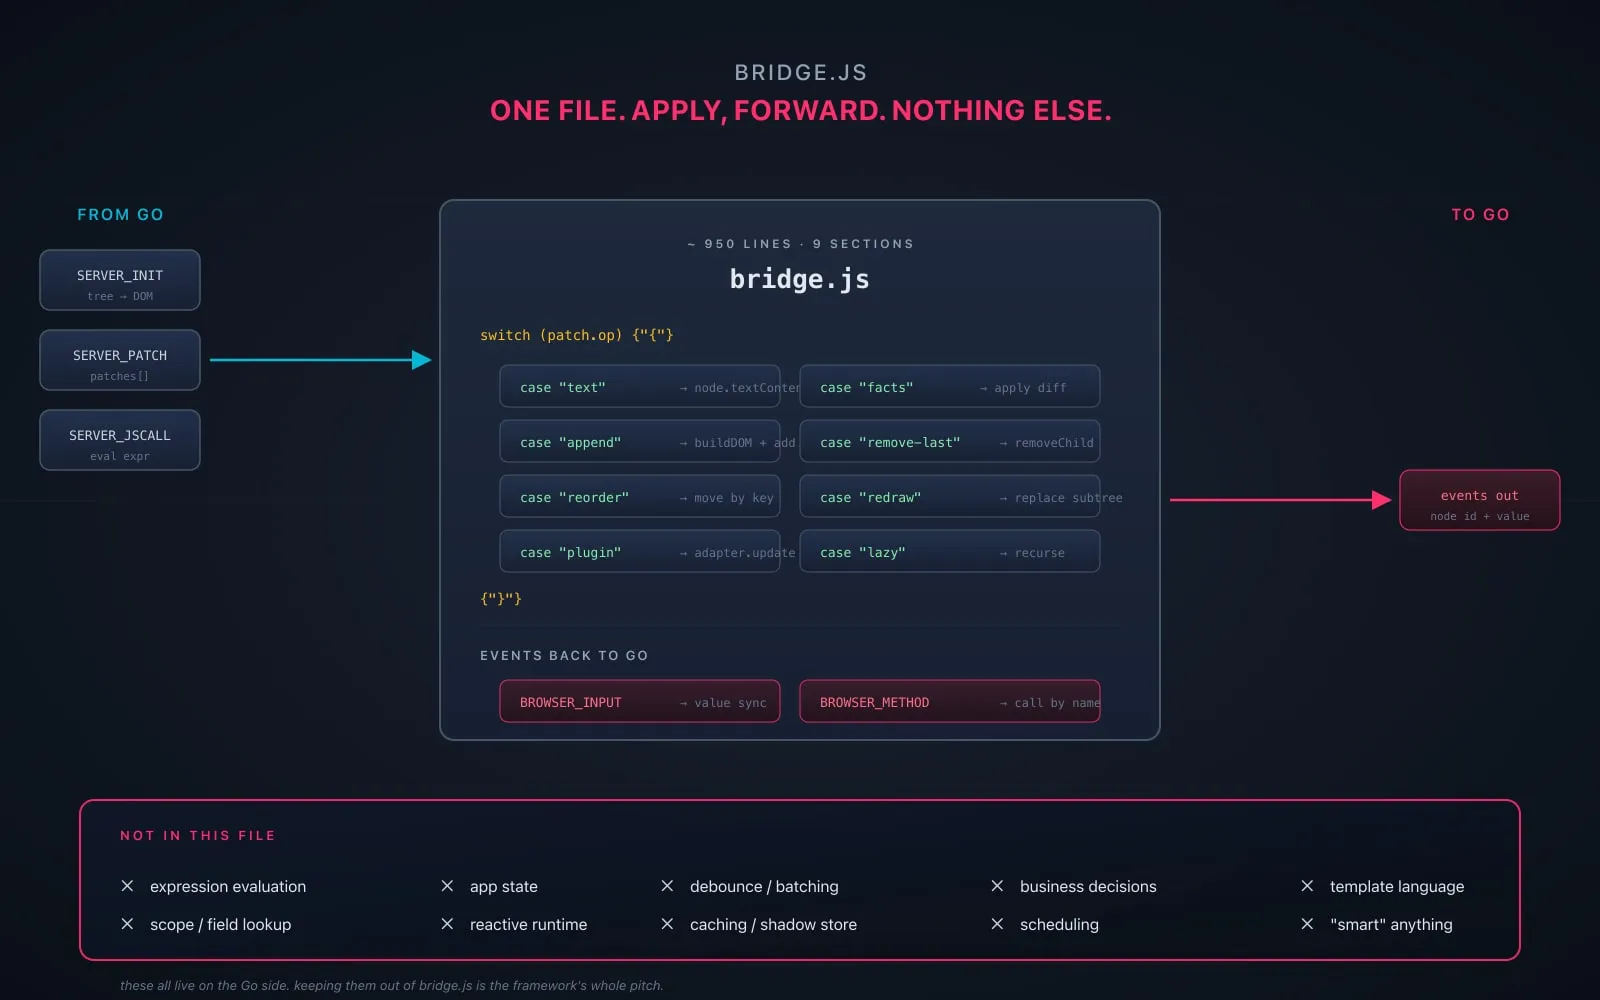
May 9, 2026
godom's bridge.js builds DOM, applies patches, and forwards events. It does not evaluate expressions, hold state, or make decisions. The constraint is the feature.
Topic trails
Agent workflows, prompting, validation loops, and where AI helps or burns.
Strategy testing, execution logic, risk, and practical trading process.
Web development, browser tools, static sites, and older JavaScript work.
Performance-minded tooling, compiled workflows, and system-level implementation.
ML, analysis, scripting, and the places where Python still fits best.
Meta writing about work, tools, migration decisions, and how I think through tradeoffs.